 how-to
How to Repair Gravel Driveway Potholes Step by Step
Quick Summary
To repair gravel driveway potholes, first find the cause, then clear loose material and cut back damaged edges. Rebuild the hole with base gravel in layers of 2 to 3 inches, compacting each layer, and correct the drainage so the repair holds.
- Fill gravel driveway potholes in layers no thicker than 2 to 3 inches.
- Compact every layer across the full repair area, overlapping passes so no spot is missed.
- Keep the gravel slightly damp so the fines bind; dry or saturated material will not compact well.
- Cut the edges of the hole back to a gentle slope so tires do not crumble them.
- Fix drainage and driveway crown first, since water is the main reason potholes return.
Table of Contents
- Diagnosing Why Your Gravel Driveway Potholes Formed
- Preparing the Pothole: Clearing, Cutting Back, and Reshaping
- Choosing the Best Gravel for Driveway Potholes
- How to Compact Gravel Driveway Repairs in Layers
- Fixing Drainage So Potholes Stay Repaired
- Scheduling Your Gravel Driveway Pothole Repair
- Frequently Asked Questions
Last Updated: October 30, 2026
Gravel driveway potholes rarely fix themselves, and they get bigger with every rainstorm and tire that rolls through the dip. Busy Man Contracting LLC offers property care and grading services that can handle the drainage side of the job.
The short version: clear out the loose material, cut back the damaged edges, add the right base material in layers, compact each layer, and correct the drainage that caused the problem.
Diagnosing Why Your Gravel Driveway Potholes Formed
Before you fill anything, figure out why the hole exists. A shallow dip is a different problem than a deep washout, and the fix depends on the cause.
Traffic, Erosion, and Poor Drainage Explained
Most gravel potholes come from three causes that often work together:
- Traffic: Tires push loose stone outward and downward, especially where cars brake, turn, or spin.
- Erosion: Water runs across the surface and carries away fine material, leaving voids underneath.
- Poor drainage: Standing water softens the base, so the surface gives way under load.
Watch out: if you fill the hole without fixing the water source, the new fill will wash out within a season or two.
Assessing the Affected Area Before Repair
Walk the whole driveway, not just the hole. Look for ruts, corrugation (washboard ripples), and areas where the surface is lower than the edges. Check which way water flows after rain. If the same spot stays muddy for days, the problem is below the surface.
A quick decision check:
| Symptom | Likely Cause | Repair Focus |
|---|---|---|
| Shallow dip, loose stone | Traffic | Re-stone and compact |
| Hole with soft, muddy base | Drainage | Drainage fix first, then rebuild |
| Ruts along the wheel path | Base failure or poor slope | Regrade and rebuild base |
| Washout with exposed subsoil | Erosion | Restore slope and add base |
Preparing the Pothole: Clearing, Cutting Back, and Reshaping
Preparation decides how long the repair lasts. Rushing this step is the most common mistake.
- Remove loose gravel and debris from the hole with a shovel or hand rake.
- Cut back the edges so they slope gently into the hole. Sharp vertical walls crumble under tires.
- Break up any compacted material at the bottom with a pick or hand tool so the new layers bond.
- Remove mud and wet, soft material. Fill will not hold on a soft base.
- Shape the hole so its center is slightly lower than the surrounding surface, which lets water drain off.
Choosing the Best Gravel for Driveway Potholes
The right material matters more than the amount. Many people fill potholes with the cheapest loose stone they can find, and it rolls right back out. A lasting repair needs angular crushed stone with a controlled blend of sizes and enough fines to lock the particles together once compacted.
What "Good" Driveway Gravel Actually Contains
Driveway aggregate is described by its top size and its gradation, the range of particle sizes from coarse stone down to dust. A well-graded blend has large particles for strength, mid-size particles to fill the gaps, and fines to bind everything together.
Two practical categories cover most pothole repairs:
- Crushed stone base (often sold as road base, crusher run, or Type 1): Angular crushed stone with a top size around 3/4 inch down to fines. This is the workhorse material for the bottom and middle layers because it compacts into a dense, load-bearing mass.
- Top-layer gravel (smaller, well-graded blend): A finer blend, commonly with a top size around 3/8 inch, used for the final inch or so to create a smooth, drivable surface that sheds water.
Ask your local supplier for a blend designed for driveways, and describe the pothole depth and surrounding surface so they can recommend the right mix.
Matching Material to the Repair
- Shallow surface dip (traffic wear): Base material for the bottom, topped with the finer surface blend.
- Hole with a soft, muddy base: Do not fill over mud. Remove the soft material, correct drainage, then rebuild with base material in lifts.
- Deep washout or exposed subsoil: Start with the coarser base material to restore structure, then finish with the surface blend.
How Much Gravel You Need
Estimate volume before you buy so you neither run short mid-repair nor leave a pile of unused stone. Measure the length, width, and average depth of the hole in feet, multiply to get cubic feet, then divide by 27 to convert to cubic yards. Because compacted material shrinks, add roughly 20 to 25 percent for compaction and spillage.
As a worked example: a hole 4 feet long, 3 feet wide, and 6 inches deep is 6 cubic feet, or about 0.22 cubic yards. Adding 25 percent brings it to roughly 0.28 cubic yards. For a series of potholes, total the volumes before ordering. Suppliers typically sell by the cubic yard or by the ton, and the tons-per-yard conversion depends on the material and its moisture, so confirm the ratio when you order.
Pricing depends on quantity, delivery distance, and the material blend, so request a quote for your specific project.
How to Compact Gravel Driveway Repairs in Layers
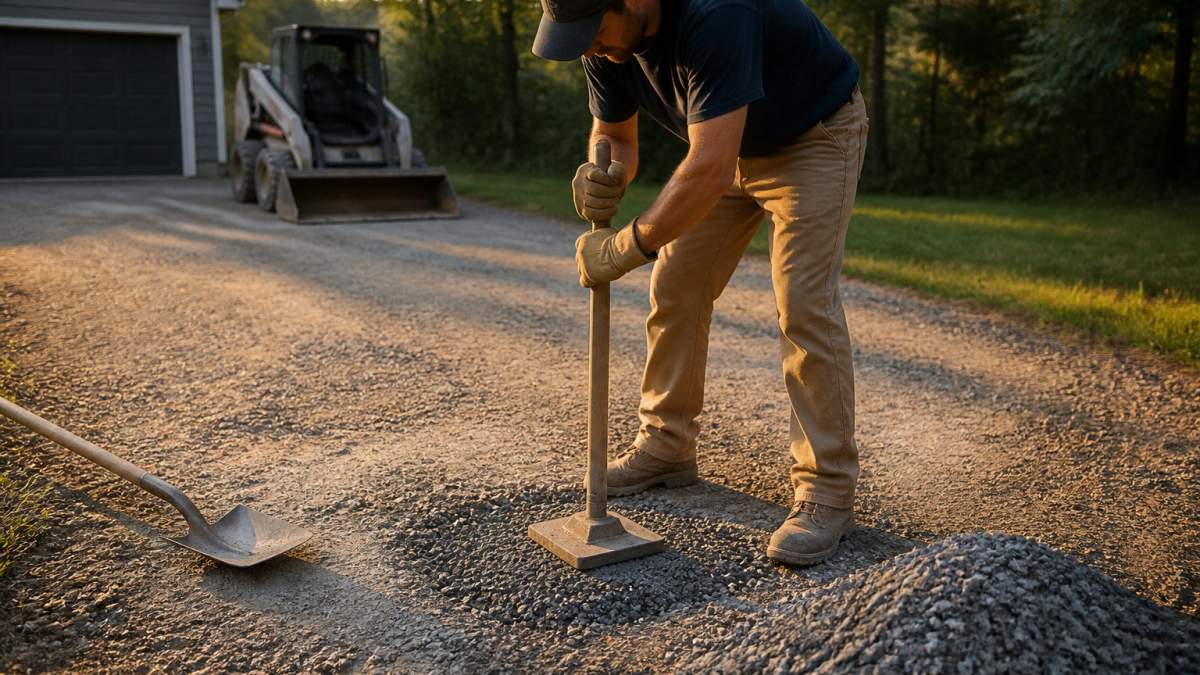
Compaction is what turns loose stone into a solid repair. Fill the hole in layers, called lifts, no thicker than about 2 to 3 inches, and compact each lift before adding the next. Compaction force only reaches so deep; a thick lift leaves loose material at the bottom that settles later and reopens the dip.
Choosing Compaction Equipment by Repair Size
Match the tool to repair size, access, and how much durability you expect:
- Hand tamper: Best for small, isolated potholes and tight spots a machine cannot reach. Effective for lifts of 2 inches or less, but labor-intensive on larger areas.
- Plate compactor (vibratory plate): The practical choice for most driveway repairs, a series of potholes, ruts, or a regraded section. A walk-behind unit handles lifts up to about 3 inches and delivers far more consistent density than hand tamping. Rentable at most equipment rental yards for a day rate.
- Vibratory roller or grading equipment: For large washouts, long rutted sections, or full-driveway regrading. Overkill for a single pothole, but right when the repair area is measured in hundreds of square feet.
A common contractor pattern is to hand-tamp small touch-ups and bring in a plate compactor whenever the repair area exceeds a few square feet or involves more than one lift.
Step-by-Step Layering and Compaction
- Add the first lift of base material, no more than 2 to 3 inches thick.
- Compact it thoroughly, working across the whole area, not just the center. Overlap passes so no spot is missed.
- Add the next lift and repeat until the fill sits just above the surrounding surface.
- Finish with a thin top layer of the finer surface blend, then compact it lightly so it knits into the base below.
- Blend the edges into the surrounding driveway so the repair does not create a new lip that tires catch.
Moisture: The Variable Most People Miss
Gravel compacts best when slightly damp, enough that the fines bind, but not so wet that the material pumps or the base turns soft. Dry, dusty material will not lock up no matter how many passes you make; saturated material will not reach density and may rut under the compactor. Squeeze a handful: it should hold together lightly without dripping water.
Checking Your Work
After compaction, the surface should feel firm underfoot and should not deflect when you walk across it. Drive over the repair slowly for the first week and inspect it after the next significant rain. Early touch-ups, re-compacting a slight dip or topping off a low edge, prevent the repair from turning back into a pothole.
Fixing Drainage So Potholes Stay Repaired
This step separates a lasting repair from a temporary patch. A practical guide to fixing drainage on property walks through how to correct the water flow across a driveway.
Check the driveway's crown, the slight high point along the center that lets water run off to the sides.
Also check ditches and culverts. A clogged ditch pushes water back onto the driveway, so clear debris and make sure water can leave the area.
Watch out: sealing the surface with a thin layer of fine gravel over a wet base traps water underneath and speeds up failure.
Scheduling Your Gravel Driveway Pothole Repair
Timing affects how well the repair sets. The best window is when the ground is dry and the soil is not frozen or saturated.
Plan the work this way:
- Dry weather, 2 to 3 days: Ideal for regrading, drainage, and multi-hole repairs.
- Right after heavy rain: Wait for the surface to firm up before compacting.
- Late fall or early spring: Frozen or thawing ground can heave repairs, so schedule earlier or later when possible.
If you want this work done, Busy Man Contracting LLC can help with site-specific estimates for gravel driveway repair.
Frequently Asked Questions
Clear loose material, cut back the edges, add base gravel in layers of 2 to 3 inches, and compact each layer. Finish with a thin top layer and correct any drainage problem that caused the hole.
Usually because water is not draining away, the base was not compacted, or fill was added without fixing the cause.
Frequently Asked Questions
How do potholes form in a gravel driveway?
Potholes usually start where water collects and where vehicles put the most weight on the surface. Tires push loose aggregate outward and down, and rain or runoff washes out the fines that hold the surface together. Once a low spot forms, water pools in it, softens the base, and the hole deepens with every pass. Checking how water moves across the driveway after a storm is the fastest way to find the cause before you repair anything.
Should you remove loose gravel before filling a pothole?
Yes. Loose, dusty, or contaminated gravel will not bond with new material and will keep shifting under traffic. Clear out loose stone and mud down to firmer material, then cut back the edges so the fill sits against solid aggregate. The repair holds much better when the new base is placed into a clean, stable hole rather than on top of debris.
What type of gravel is best for filling driveway potholes?
A crushed aggregate with angular stone and a mix of sizes, often sold as Type 1 base or a similar crusher-run blend, packs tightly and resists washing out. Avoid round pea gravel and decorative stone, which roll under tires. Confirm the material with your local supplier for your specific driveway before ordering.
Do you need to compact gravel when repairing a pothole?
Yes, compaction is what keeps a pothole repair from sinking again. Add the base in thin layers of roughly 2 to 3 inches, and compact each lift before adding the next. Loose fill that is not compacted will settle under the first few vehicles and recreate the hole. A plate compactor or a tamper works for small repairs, and a larger job may call for equipment such as a roller.