 How-to
7 Dry Well Installation Steps for Yard Drainage That Works
Last Updated: November 10, 2026
Quick Summary
Dry well installation captures stormwater in a buried gravel or chamber pit and lets it soak into the soil, typically 3 to 5 feet deep and sized to your roof runoff. The sequence runs from calling 811 and confirming setbacks through digging, filter fabric, washed stone, inlet, overflow, backfill, and testing.
- A dry well drainage system has three parts: storage, infiltration, and overflow.
- Skip a dry well if your soil is heavy clay or the water table sits high.
- A 1,200-square-foot roof section sheds about 95 cubic feet in a 1-inch storm.
- Wrap the pit in nonwoven filter fabric and overlap seams by at least 6 inches.
- Backfill in roughly 6-inch lifts and compact each one to prevent settling.
Table of Contents
- What a Dry Well Does for Yard Drainage
- How Deep Should a Dry Well Be?
- Sizing, Soil, and Site Checks Before Installation
- Dry Well Without Container: Does It Work?
- Step-by-Step Dry Well Installation for Yard Drainage
- Permits, Utility Locating, and Safety on the Dig
- Frequently Asked Questions
What a Dry Well Does for Yard Drainage
A dry well is a buried pit filled with gravel or a prefabricated chamber that collects stormwater and lets it soak slowly into the soil. It solves one problem: water pooling where it shouldn't. These systems are dug into yards that flood every spring. Catch the water, hold it, release it underground.
How a Dry Well Drainage System Handles Stormwater
Water enters through a grate, catch basin, or downspout line, sits in the void space between stones or inside the chamber, then percolates outward through the surrounding soil. A dry well drainage system doesn't move water off your property; it gives that water somewhere to go besides your foundation, driveway, or the low corner of your lawn.
Three parts make it work:
- Storage: the void space in gravel or the chamber volume
- Infiltration: how fast surrounding soil absorbs water
- Overflow: a backup route when the well fills faster than it drains
That last part gets skipped constantly. A dry well with no overflow is a bathtub with no drain.
When a Dry Well Is the Right Fix for Water Pooling
It fits when you have a contained low spot and decent soil. A downspout dumping onto a walkway. A soggy patch that never dries. Water sheeting toward a foundation wall.
It does not fit everywhere. Skip it if your soil is heavy clay, the water table sits high, or the problem is a whole-property grading issue. For the bigger picture, see how to fix drainage on property.
How Deep Should a Dry Well Be?
Most residential dry wells land between 3 and 5 feet deep, sitting below the frost line and above the seasonal water table. Depth comes from two readings: how deep water sits in winter, and how deep your soil still drains.
Deeper is not automatically better. Dig past the water table and you build an underground pond that never empties. Dig too shallow and the well holds almost nothing.
Reading Your Dry Well Diagram Before You Dig
A dry well diagram is a cross-section drawing showing four layers: the inlet pipe, the gravel or chamber, the filter fabric wrap, and the native soil below. It also marks the overflow line and the distance to the house.
Draw one before you touch a shovel. Mark downspout locations, the pit outline, the overflow direction, and the depth, so the pit is not dug in a spot that sends water back toward the foundation.
Sizing, Soil, and Site Checks Before Installation
Size the well to the water it must handle, not to the size of the hole you feel like digging. Three checks decide everything: runoff volume, soil permeability, and separation distances.
Runoff Volume: A Worked Sizing Example
Runoff volume comes from the roof area feeding the well and the local rainfall intensity you design for.
Worked example. A 1,200-square-foot roof section drains to one downspout. A 1-inch rainstorm is 1/12 foot. So:
- 1,200 sq ft × (1/12 ft) × 0.95 ≈ 95 cubic feet of runoff from that storm.
Now compare that to storage.
That is the point most guides miss: a dry well is a storage-plus-infiltration system, not a tank.
Prefabricated chambers are rated by manufacturers for storage volume, so read the manufacturer's stated storage volume rather than the box dimensions.
Soil Permeability and the Percolation Test
Soil permeability comes from a percolation test. A percolation test is typically performed by digging a test hole at the planned pit depth, filling it with water, and timing how far the level drops. Record inches per hour. Fast-draining sandy soil needs a smaller pit; slow clay needs a much larger one, or a different solution entirely.
Setbacks, Groundwater, and Well Protection
Setbacks are where local rules matter most, and they vary. Treat these as planning starting points, then confirm every one with your building department and local stormwater authority:
- Foundation: keep the pit far enough from the house that infiltration does not push water back toward the basement or crawlspace. Setback distances vary, so confirm the required minimum with your local building department.
- Property lines: stay clear of the line, and check whether your jurisdiction requires a set distance or an easement.
- Drinking-water wells: separation from a private well is usually the strictest number on the site. Confirm the required distance with your local health department before you dig.
Grading shapes where water flows, so if your site slopes oddly, it is worth understanding how grading contractors approach site drainage before you finalize the pit location.
Dry Well Without Container: Does It Work?
Yes, a dry well without a container works.
It has real advantages. No plastic to crack. Cheaper materials. Easy to size to any footprint.
It has real drawbacks. Fabric clogs over time. Stone pits lose capacity as sediment works in. And you cannot inspect the inside.
Prefabricated chambers and plastic drums hold more water per cubic foot and stay clean longer.
| Option | Storage per Volume | Lifespan | Best For |
|---|---|---|---|
| Gravel and fabric pit | Lower | Long, but clogs | Light loads, sandy soil |
| Prefabricated chamber | Higher | Long | Most residential downspouts |
| Plastic drum | Moderate | Moderate | Small, contained spots |
| Concrete sleeve | Moderate | Very long | Heavy-duty or commercial |
Step-by-Step Dry Well Installation for Yard Drainage
Here is the sequence we follow on a residential dig, with the dimensions and material specs that matter.
- Locate utilities. Call 811 before any digging and wait for the marks (811 Before You Dig). Mark water, gas, electric, septic, and any private lines the service does not cover (irrigation, landscape lighting, a previous owner's drain tile).
- Confirm the spot. Recheck setbacks, slope, and the overflow direction. Stake the pit outline and the overflow route.
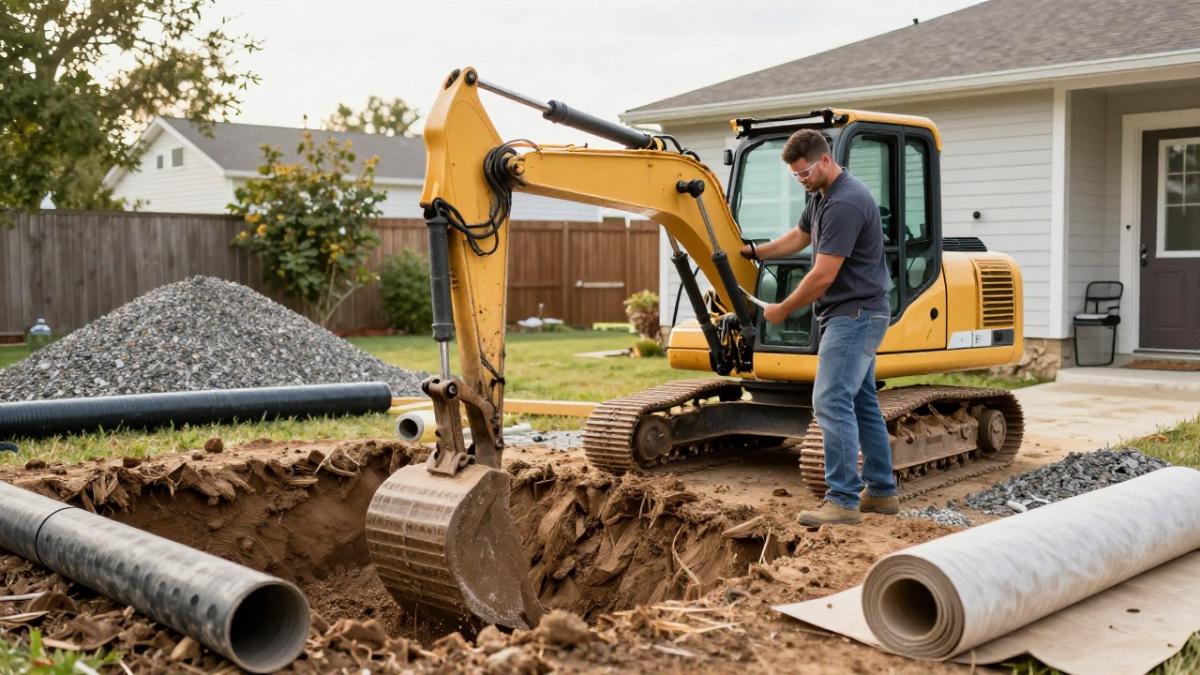
- Dig the pit. Excavate to your planned depth and width with clean, near-vertical sides. A typical residential pit runs 3 to 5 feet deep and 3 to 6 feet across, sized from the calculation above. Keep the spoil pile well back from the edge.
- Line with fabric. Wrap the walls and floor with a nonwoven filter fabric, overlapping seams by at least 6 inches and leaving enough overhang to fold over the top of the stone.
- Add gravel. Lay a base of washed, crushed stone, roughly 3/4-inch to 1 1/2-inch clean stone. Avoid sand, crusher run, and anything with fines; fines fill the voids you paid for.
- Set the inlet. Connect the downspout or catch basin line so water enters near the top of the pit. Use solid pipe from the roof to the pit, and slope it so water drains toward the well, not back toward the house.
- Add overflow. Run an overflow line from the top of the well to a safe discharge point downhill and away from the foundation. This is the part that keeps a full well from becoming a bathtub.
- Wrap and backfill. Fold the fabric over the stone, then backfill with soil in thin lifts, roughly 6 inches at a time, and compact each lift. Skip the compaction and the pit settles into a dip in your lawn.
- Test it. Run water through the inlet and watch the level drop. If it backs up immediately, the inlet slope or the stone is wrong.
- Restore the surface. Reseed, mulch, or reset the lawn, and keep foot traffic off the fresh backfill until it settles.
Excavation, Gravel, Fabric, and Backfill
Washed crushed stone is generally used rather than sand or dirt, and filter fabric is commonly used to keep soil from migrating into the stone. If you plan to hire out the digging, it helps to know how to choose a trenching service before you book the work.
Watch out: an unsupported trench or pit wall in loose or sandy soil can collapse without warning. Slope or shore the walls if the soil will not stand.
Connecting Downspouts, Catch Basins, and French Drains
Route roof runoff into the well with solid drain pipe, not perforated, until it reaches the pit. A catch basin collects surface water and sediment before it enters the well, extending the life of the stone.
Protecting topsoil around the overflow outlet matters more than people expect. Our guide on preventing soil erosion from runoff covers the grading and mulch steps that keep the discharge point from washing out.
Safety and When to Hire a Professional
Digging near utilities, foundations, or on a slope is not a solo job. Call 811, keep the pit covered or backfilled before you stop for the day, and wear eye and hand protection. Bring in a professional when the pit is deep, the soil is loose, utilities run close, or the grading problem is bigger than one low spot. If you would rather have the excavation, backfill, and grading handled by machine, our full range of property services covers trenching, grading, and drainage work.
Permits, Utility Locating, and Safety on the Dig
Call 811 before you dig. That is not a suggestion; it is how you avoid hitting a water line or septic system.
Check with your local building department on permits.
Safety on the dig:
- Never enter an unsupported trench deeper than knee height
- Keep spoil piles back from the pit edge
- Slope or shore the walls in loose soil
Watch out: an open pit left overnight in a neighborhood is a real hazard. Backfill or cover it before you stop for the day.
A dry well only works when the site checks, sizing, and overflow are right.
Frequently Asked Questions
How do you know if your yard is suitable for a dry well?
Start with a percolation test: dig a test hole to the planned depth, fill it with water, and see how fast it drains. If water sits for an extended period, the soil may be too tight for a dry well, and a different outlet may be needed. Also check the water table depth, slope, and distance from foundations and property lines. Clay-heavy soil often needs a larger footprint or an alternative drainage route. A site assessment confirms whether your soil can absorb the runoff volume you generate.
How deep should a dry well be in the ground?
Depth depends on your frost line, the water table, and how much runoff you need to store. Depth depends on local conditions, so the appropriate bottom and top elevations are set after a site review. Shallower pits risk freezing and overflow; deeper pits risk hitting groundwater. A percolation test at the planned depth is a useful first step. Your dry well diagram should show the inlet pipe slope, gravel envelope, and overflow point before excavation begins.
Can you install a dry well without a container?
Yes. A dry well without container is simply a gravel-filled pit lined with filter fabric, sometimes called a soakaway or dry well without a tank. Crushed stone creates void space for stormwater to store while it infiltrates. It works well in sandy or loamy soil with good permeability. In clay soil, a containerless pit can silt up faster, so fabric wrapping and a clean stone grade matter. Some homeowners choose a containerless pit to limit material costs, though it generally requires more gravel and careful sizing.
How does a dry well connect to a downspout or French drain?
The dry well drainage system ties in through a perforated or solid drain pipe set on a slope that lets water flow by gravity. Downspouts connect through a catch basin or a cleanout to keep leaves and sediment out. French drains feed the same line from low spots in the yard. Every connection needs a filter fabric wrap and a gravel bed to prevent clogging. Include an overflow outlet to daylight or a secondary infiltration area for heavy rain.